Showing posts with label Desserts. Show all posts

Monday, September 2, 2013

S'more Cups


     This is an amazingly easy recipe that tastes as good as S'mores on the campfire.
The best thing is that they can be made ahead of time. Thank you Pampered Chef YUMM !!

S’more Cups
(printable version)
Yield: 24 cups 
Prep Time: 20 minutes
Cook Time: 7 minutes

Ingredients:


7 whole graham crackers (1 cup), finely crushed
1/4 cup powdered sugar
6 tablespoons unsalted butter, melted
4 bars (1.55 oz) milk chocolate candy, divided
12 large marshmallows

Directions:Preheat oven to 350°F.
Place graham crackers into a large re-sealable plastic bag. Finely crush into crumbs. Combine graham cracker crumbs, powdered sugar and butter into a small bowl. Evenly divide crumb mixture into each cup of a 24 cup mini muffin pan. Press crumbs to form shallow cups. Bake 4-5 minutes or until edges are bubbling. Meanwhile, break two of the candy bars into rectangles. Remove pan from oven; place one rectangle into each cup.
Cut marshmallows in half crosswise using scissors dipped in cold water. Place one marshmallow half, cut-side down, into each cup. Return to oven 1-2 minutes or until marshmallows are just slightly softened. Cool on a cooling rack for 15 minutes before carefully removing cups from pan. Cool completely on wire rack.
Break remaining candy bars in small pieces and place in a small bowl. Microwave on high 1 minute-1 1/2 minutes or until melted and smooth, stirring every 20 seconds. Dip the top of each marshmallow into the melted chocolate. Turn top-side up and let stand until set.

Recipe Note: Store the cups in a single layer in an airtight container for up to 1 week. Freezing is not recommended.

Sunday, October 21, 2012

Pumpkin Cheesecake Crumble Bars

This amazing recipe recipe came from Mels Kitchen Cafe, She always has the best recipes that are mostly from scratch. YUMMY !! I added a drizzle of caramel sauce to mine partly for presentation but the flavors paired nicely.
 
Pumpkin Cheesecake Crumble Bars
(printable version)
*Makes 16 squares
INGREDIENTS:
Crust:
1 cup all-purpose flour
3/4 cup packed light brown sugar
1/4 teaspoon salt
1/2 cup (1 stick) chilled butter, diced
1 cup pecan halves (about 4 ounces)
3/4 cup old-fashioned or quick rolled oats
Filling:
1 (8-ounce) package cream cheese (light or regular), room temperature
1 1/2 cups canned pure pumpkin (a little less than a full 15-ounce can)
1 cup granulated sugar
1 large egg
1 1/2 teaspoons ground cinnamon
1/2 teaspoon ground ginger

Topping:
2 cups sour cream
4 tablespoons sugar
1/2 teaspoon vanilla extract

DIRECTIONS:
Preheat the oven to 350°F. Lightly coat a 9X13-inch metal baking pan with cooking spray. Set aside. Line a large, rimmed baking sheet with parchment paper or a silicone baking mat. Set aside. Blend the flour, brown sugar, salt, and butter by pulsing (in a blender or food processor) until the texture is like coarse meal. Add the pecans and pulse until the nuts are chipped. Add the oats, and again pulse until the mixture is moistened by not clumping. Press about 3 cups of the crumbs onto the bottom of the prepared 9X13-inch pan. Transfer the remaining crumbs to the lined baking sheet. Bake the crumbs until golden, stirring once, about 8-10 minutes. Cool crumbs. While they cool, bake the crust until golden, about 10-12 minutes. Remove from the oven and set aside while preparing filling. Keep the oven turned on.
For filling, blend all the ingredients in the same blender or food processor (no need to clean it in between) until smooth. Spread the filling over the warm crust and bake until it is slightly firm to the touch and the edges are just slightly risen, about 18-20 minutes. Keep that oven on!
For the topping, whisk all the ingredients together in a bowl. Spread the topping evenly over the hot, baked filling. Bake until the topping sets and bubbles at the edges, about 5-7 minutes. Cool the bars completely in the pan set on a cooling rack. Once cooled, sprinkle the golden crumbs over the topping and gently press them into the topping. Cover the bars and chill until cold, about 2 hours. Cut into squares and serve. I drizzled caramel syrup over the top as a decorative touch it was a perfect addition not that they needed it .

Monday, August 6, 2012

Berry Hand Pies


 These Hand Pies were easy to make ....they will be a great addition to school lunches this fall. I found the recipe on King Arthur's Flour website.. Enjoy !!


Blueberry Hand Pies

(Printable Version)
 
These sweet and fruit-full pastries can be served anytime and anywhere, thanks to their convenient portability.

Pastry
2 cups All Purpose Flour
1/2 teaspoon salt
1/2 teaspoon baking powder
1 cup (16 tablespoons) cold unsalted butter
1/2 cup cold sour cream

Filling
2 cups blueberries, fresh or frozen
1/4 cup sugar
1 tablespoon Instant ClearJel
2 teaspoons lemon juiceTopping

1 large egg, beaten
white sparkling sugar, for garnish

Directions
1) To make the dough: Whisk together the flour, salt, and baking powder. Add the butter, working it in to make a coarse/crumbly mixture. Leave most of the butter in large, pea-sized pieces.
2) Stir in the sour cream; the dough won't be cohesive. Turn it out onto a floured work surface, and bring it together with a few quick kneads.
3) Pat the dough into a rough log, and roll it into an 8" x 10" rectangle. Dust both sides of the dough with flour, and starting with a shorter end, fold it in three like a business letter.
4) Flip the dough over, give it a 90° turn on your work surface, and roll it again into an 8" x 10" rectangle. Fold it in three again.
5) Wrap the dough, and chill for at least 30 minutes before using.
6) To make the filling: Combine all the ingredients in a saucepan set over medium heat. Cook until the mixture starts to thicken, about 5 minutes. Transfer the cooked berries to a bowl and let cool to room temperature.
7) Preheat the oven to 425°F; place a rack on the middle shelf. Line a baking sheet with parchment paper.
8) To assemble the pies: Roll the dough into a 14" x 14" square. With a straight edge and pastry wheel, or a 3 1/2" square cutter, cut out sixteen 3 1/2" squares.
9) Divide the filling among eight of the squares, using about a heaping tablespoon for each. Brush some of the beaten egg along the edges of each filled square.
10) Cut a vent into the each of the remaining eight squares, using a decorative cutter of your choice.
11) Top each filled square with a vented square, and press along the edges with the tines of a fork or a pie crust crimper to seal.
12) Brush the top of each pie with the remaining beaten egg, and sprinkle with sparkling sugar. Transfer the pies to the prepared baking sheet.
13) Bake the pies for 18 to 20 minutes. Remove them from the oven, and let cool for 20 minutes before serving.
Yield: 8 hand pies.


Sunday, July 8, 2012

Raspberry Bread Pudding


I had this yummy treat at a ward relief society function, I begged for the recipe immediately. My  friend Stacy was awesome and shared.

This is a great recipe that you can use with any type of berry.
The picture above I used a mixture of raspberries, blackberries and blueberries.
It's a great brunch item as well. Enjoy...............we sure did.

KNEADERS RASPBERRY BREAD PUDDING

  • 1 1/2 loaves aged, white bread ( I used regular french bread)
  • 1 qt. heavy cream
  • 3 C. sugar
  • 2 eggs
  • 1 tsp. vanilla
  • 5 C. raspberries, fresh or frozen
  • 1 C. sugar
  • 1/2 C. apple juice
In a large bowl mix the cream, sugar, egg and vanilla.
Cut bread into 1 1/2 inch cubes and add to cream mixture, coating the bread well.
Let stand 30 minutes, stirring every 5 minutes to allow cream to absorb.
Mix the raspberries, sugar and apple juice, stirring until sugar is dissolved.
Layer a 9x13 inch baking pan 3/4 full with the bread mix and pour fruit filling over the bread mix, spreading evenly.
Top with the remaining bread.
Bake 50 minutes at 375.
Serve warm topped with vanilla cream sauce.
(If you want it to cut into nice squares you can chill it and then cut it into squares, then microwave it for 20-25 seconds per piece and top with sauce.)

Vanilla Cream Sauce
  • 1 1/3 C. butter
  • 5 T. flour
  • 3 C. heavy cream
  • 1/2 tsp. salt
  • 2 tsp vanilla
  • 2/3 C. sugar
Melt butter in medium saucepan and add flour. Stir 10 minutes until it has a nutty aroma, do not brown. Add salt, cream and sugar until mix is thick. Remove from heat and stir in vanilla. Serve warm over the pudding.


Saturday, March 31, 2012

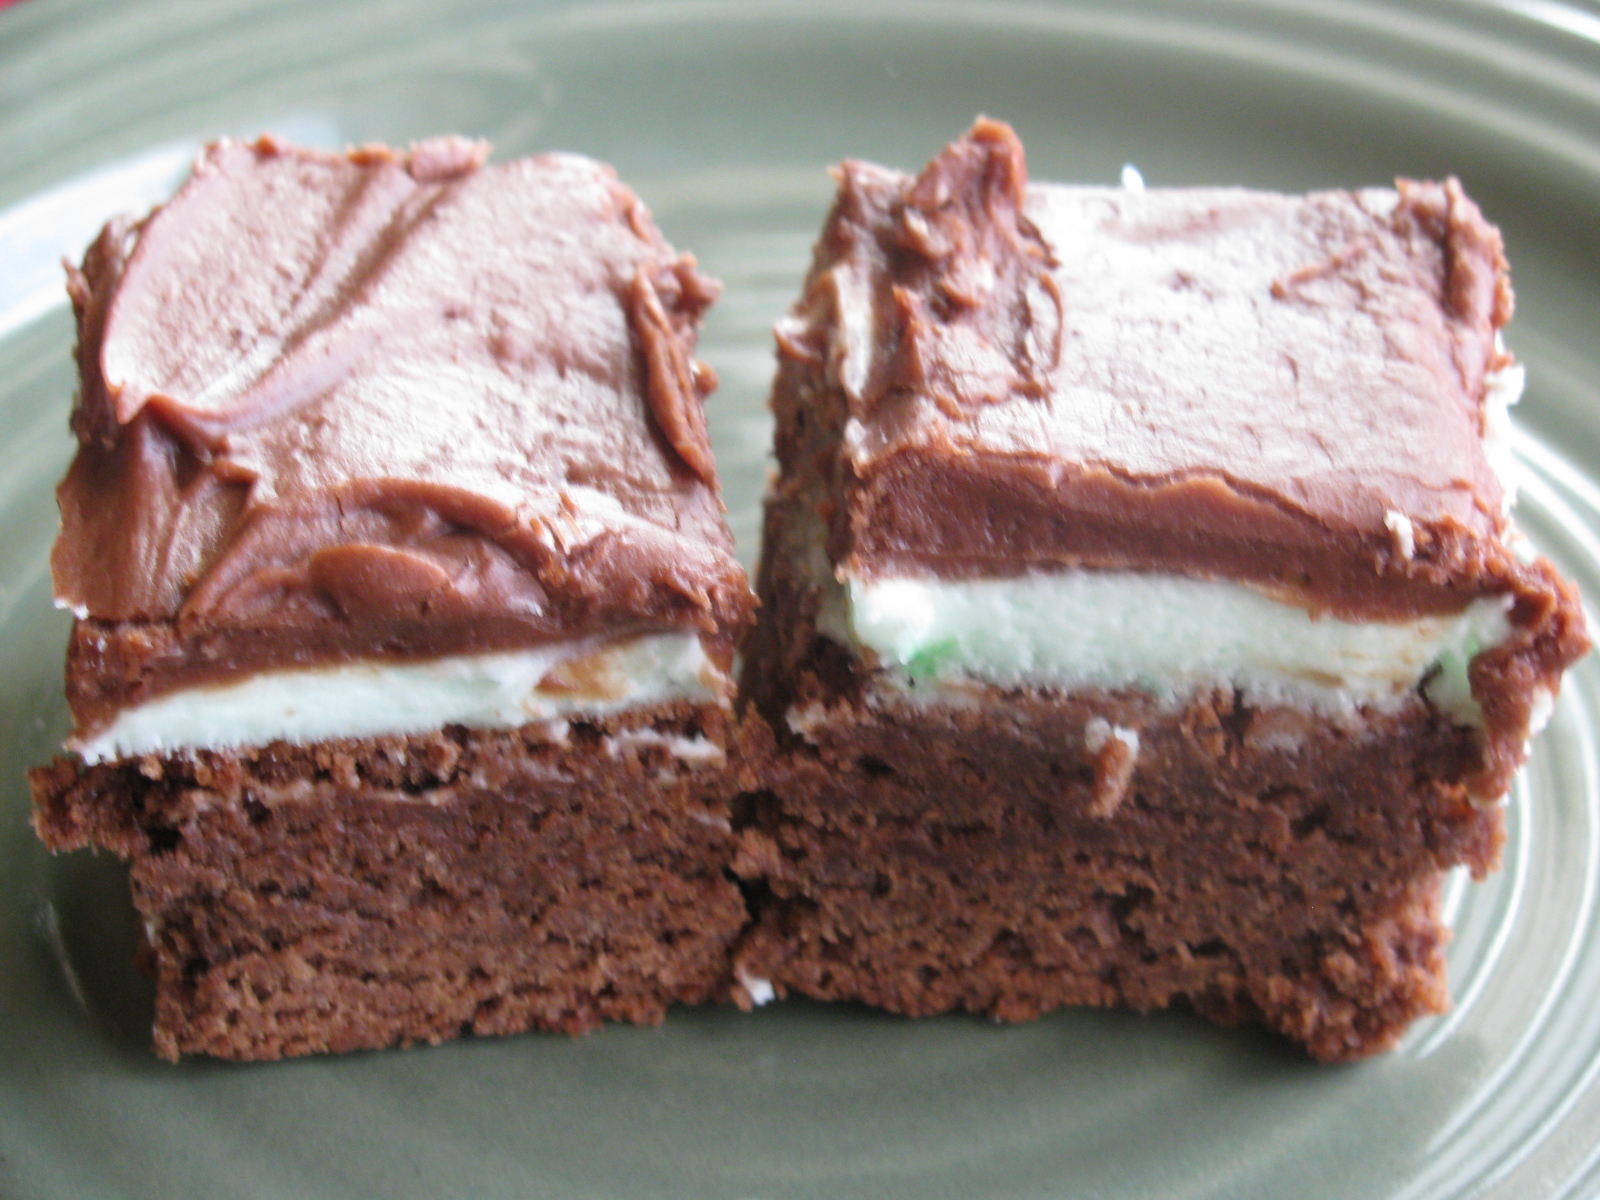
BYU Mint Brownies

I have recently been using some of the Doterra Essential oils and decided to try the peppermint oil in this brownie recipe. It worked perfectly. These brownies were a hit !!! This is the classic BYU Mint Brownie Recipes that is sold on campus. Enjoy !!
BYU MINT BROWNIES
MAKES ONE 9-BY-13 PAN OF BROWNIES.
PREP AND COOK: 90 min. COOL: 1 hr.
1 c. margarine
1/2 c. cocoa
2 Tbsp. honey
4 eggs
2 c. sugar
1 3/4 c. flour
1/2 Tbsp. baking powder
1/2 tsp. salt
1 c. chopped walnuts
12 oz. chocolate icing (Use your own icing recipe or purchase some chocolate frosting. You can also search the Internet for chocolate icing recipes.)
MINT ICING
5 Tbsp. margarine
dash of salt
3 Tbsp. milk
1 Tbsp. light corn syrup
2 1/3 c. powdered sugar
1/2 tsp. mint extract
1-2 drops green food coloring

1. Melt margarine and mix in cocoa. Allow to cool. Add honey, eggs, sugar, flour, baking powder, and salt. Mix well. Add nuts. Pour batter into a greased 9-by-13 baking pan. Bake at 350 degrees for 25 minutes. Cool.

2. Prepare mint icing: Soften margarine. Add salt, corn syrup, and powdered sugar. Beat until smooth and fluffy. Add mint extract and food coloring. Mix. Add milk gradually until the consistency is a little thinner than cake frosting.

3. Spread mint icing over brownies. Place brownies in the freezer for a short time to stiffen the icing. Remove from the freezer and carefully add a layer of chocolate icing.

Monday, February 20, 2012

Buttery Sugar Glazed Doughnuts

Okay I must admit memories of homemade doughnuts are only those from a young women activity in high school the result was a sugary grease bomb. This recipe turned out perfectly and if you make sure your  oil is hot (350*-360*) before frying the doughnuts will not be greasy. The kids are ecstatic and kinda think I'm cool for venturing out in this arena. Next time we will experiment with a few different toppings. I chose to keep it simple today. :) I saw this recipe at Real Mom Kitchen she did hers heart shaped for Valentines day .


Buttery Sugar Glazed Doughnuts
makes 26 doughnuts and holes (Print This)

Yeast Doughnuts
1 cup warm milk
1/3 cup sugar
1 package instant yeast
2 large eggs, beaten
1 1/3 stick melted butter (not hot, just melted)
1 tablespoon Vanilla
4 cup All Purpose Flour
pinch of salt
Oil, for frying

Add sugar to the warm milk (around 110 degrees), and stir until the sugar is dissolved. Add the yeast, and allow to rest around 10 minutes.

Combine the eggs with the butter and vanilla in the bowl of a stand mixer. Mix on medium low speed with the dough hook until well combined. After the 10 minutes have passed on the yeast, add the mixture to the butter/egg combination, and mix for a few minutes. In a separate bowl, combine the flour and salt

Begin adding the flour, one half cup at a time, until it is all incorporated. Use a medium speed for this. Do not over knead, dough will be a bit sticky.

Remove dough from the mixer, and place in a greased bowl. Cover tightly and refrigerate for 4-5 hours, or overnight is you wish.

Roll out the dough to 1/3 to 1/5 inch thickness. Cut with a doughnut cutter (or biscuit cutter)

Place cut doughnuts on parchment, and allow to rise in a warm place until very airy and light.

Heat oil to 350/360, and drop doughnuts in one at a time. Cooking time will vary based on the heat of your oil, but 15 seconds per side worked for me. Remove from oil and pat with paper towels. Continue until all doughnuts are fried.

Dip in glaze. Allow to dry. Dip again, if desired. Serve and enjoy!

Doughnut Glaze
4 cups powdered sugar
3/4 teaspoon salt
2 teaspoons vanilla
2/3 cup milk

Stir all ingredients together until well combine


Saturday, February 18, 2012

Vanilla Cupcakes with Raspberry Filling


I made thes great cupcakes for Valentines Day. They were a big hit. I found the recipe at Jamie cooks it up. This recipe is a definite keeper.
Vanilla Cupcakes wih Raspberry Filling
RASPBERRY FILLING:
2 heaping C (one 12 ounce package) frozen raspberries
1 1/2 T cornstarch
2 T lemon juice
1/2 C sugar
1 T butter
1 t almond extract
dash salt

CUPCAKE:
1 box Duncan Hines White Cake Mix
1/3 C flour
1 (3.4 ounce) box instant vanilla pudding
4 eggs
1/3 C sour cream
1 1/2 C water
1/3 C oil
1 t almond extract

FROSTING:
1 (8 ounce) package cream cheese, softened
1/2 C butter, softened
3 T shortening (I use butter flavored Crisco)
5 1/2 C powdered sugar
4 T whipping cream
1 t vanilla
dash salt

RASPBERRY FILLING
1. Place 2 heaping cups frozen raspberries, 1 1/2 T cornstarch, 2 T lemon juice and 1/2 C sugar into a medium sized sauce pan. Stir it around with a whisk to combine.
2. Bring the mixture to a boil over medium high heat, stirring constantly. The raspberries will break down very quickly. Continue to stir while the mixture boils for about 2 minutes.
or until the filling becomes glossy and thick...like this.
3. Remove the pan from the heat, add 1 tablespoon butter, 1 teaspoon almond extract and a dash of salt. The filling is a bit sour if eaten plain. However, remember that we are going to pipe it into a sweet cupcake and top it with an even sweeter frosting. The sweet and tart will work nicely together.
4. Set the filling aside to cool.

CUPCAKES
1. Into your stand mixer add 1 box white cake mix, 1/3 C flour and 1 small box of vanilla pudding. Toss it around with a fork to combine.
2. Add 4 eggs, 1/3 C sour cream, 1 1/2 C water, 1/3 C oil and 1 t almond extract to the dry ingredients. Mix on low for about 1 minute. Then scrape the sides of you mixer with a rubber spatula and beat on medium speed until the batter is smooth and a bit thick. 2-3 minutes should do the trick.
3. Line your muffin tins with cupcake liners and spoon the batter into them.  Fill the liners just a bit over half way full. This will give you a nice round domed cupcake. If you fill them too full  you will have cupcakes with more of a mushroom shape.
4. Bake the cupcakes at 350 degrees for 12-15 minutes or until a toothpick inserted into the center comes out clean.
5. Remove the pans from you oven and allow the cupcakes to rest in the pans for about 5 minutes. Then transfer them to a wire rack and let them cool completely.
6. When your cupcakes (and filling) have cooled completely, place a large cake decorating tip into a pastry bag. Carefully fill the bag with the raspberry filling. This can get a little bit messy. Be sure that when you are filling the bag you turn the tip end up a bit so the filling doesn't run out.
7. Pipe the filling into each cupcake.

FROSTING
1. Place 1 package softened cream cheese, 1/2 C softened butter and 3 tablespoons shortning into your stand mixer. Beat on medium speed until well combined and smooth.
2. Add 5 1/2 C powdered sugar, 4 tablespoons whipping cream, 1 teaspoon vanilla and a dash of salt. Mix until well combined. If the mixture is too thick, add a bit more whipping cream. If it gets too runny, add a bit more powdered sugar.
3. Fill another pastry bag with the frosting and pipe it onto each cupcake.


Saturday, August 6, 2011

Eclairs

I finally decided to try my hand at making Eclairs.( I am not sure what I have been waiting for. )This recipe was great!! The kids enjoyed helping. The filling made a little more than I needed so my grand daughter had a bowl of pudding while we waited for these to cool. If you think that making eclairs may be too time consuming or difficult then this recipe is for you. Try these today.


Eclairs:
Ingredients:
1/2 cup butter
1 cup water
1 cup all-purpose flour
1/4 teaspoon salt
4 eggs
Filling :
1 (5 ounce) package instant vanilla
pudding mix
2 1/2 cups cold milk
1 cup heavy cream
1/4 cup confectioners' sugar
1 teaspoon vanilla extract
 Chocolate Glaze :
2 (1 ounce) squares semisweet
chocolate
2 tablespoons butter
1 cup confectioners' sugar
1 teaspoon vanilla extract
3 tablespoons hot water


Directions:
1.
Preheat oven to 450 degrees F (230 degrees C). Grease a cookie sheet.
2.
In a medium saucepan, combine 1/2 cup butter and 1 cup water. Bring to a boil, stirring until butter melts completely. Reduce heat to low, and add flour and salt. Stir vigorously until mixture leaves the sides of the pan and begins to form a stiff ball. Remove from heat. Add eggs, one at a time, beating well to incorporate completely after each addition. With a spoon or a pastry bag fitted with a No. 10, or larger, tip, spoon or pipe dough onto cookie sheet in 1 1/2 x 4 inch strips.
3.
Bake 15 minutes in the preheated oven, then reduce heat to 325 degrees F (165 degrees C) and bake 20  minutes more,(I only baked mine an additional 13 minutes more and they were perfect) until hollow sounding when lightly tapped on the bottom. Cool completely on a wire rack.
4.
For the filling, combine pudding mix and milk in medium bowl according to package directions. In a separate bowl, beat the cream with an electric mixer until soft peaks form. Beat in 1/4 cup confectioners' sugar and 1 teaspoon vanilla. Fold whipped cream into pudding. Cut tops off of cooled pastry shells with a sharp knife. Fill shells with pudding mixture and replace tops.
5.
For the icing, melt the chocolate and 2 tablespoons butter in a medium saucepan over low heat. Stir in 1 cup confectioners' sugar and 1 teaspoon vanilla. Stir in hot water, one tablespoon at a time, until icing is smooth and has reached desired consistency. Remove from heat, cool slightly, and drizzle over filled eclairs. Refrigerate until serving.


Sunday, July 17, 2011

Apple Cobbler

This cobbler is so easy to make. It can be made with any flavor pie filling. I make this with my home canned Apple Pie Filling. I would dare say that this is My husband's favorite dessert. Top it with a scoop of vanilla ice cream and it is hard to beat .


Pie Filling Cobbler
(Printable Version)

Ingredients :
1/2 cup butter or 1/2 cup margarine, melted
1 cup sugar
3/4 cup flour
1/2 teaspoon salt
2 teaspoons baking powder
3/4 cup milk
1 (15 ounce) cans pie filling ( flavor of your choice)

Directions
Melt butter or margarine in baking dish.
Mix sugar, flour, salt, and baking powder.
Add milk and mix well.
Pour batter into melted butter-- do not stir.
Pour pie filling into batter (I drop it by spoonful and put several spoons in the middle and then divide the rest into the corners and sides-- do not stir).
Bake@ 350° for 50 minutes to 1 hour or until golden brown.


Friday, July 15, 2011

Oreo Cupcakes


I saw this recipe and knew I had to try it. Just as I thought it was a huge hit!!
Who doesn't cupcakes right? Go Ahead make them and then head straight to the gym:)


Cakes:
24 teaspoons Oreo crumbs
¼ cup water
½ cup buttermilk
½ cup oil
1 teaspoon vanilla extract
1 cup sour cream
3 eggs
Devil’s Food Cake Mix

Oreo Buttercream:
8 ounces cream cheese
¼ cup butter
Oreo cream from cookies
1 teaspoon vanilla extract
2 ½- 3 ½ cups powdered sugar
2 tablespoons heavy cream or milk
1 cup Oreo crumbs, sifted

Directions:
1.     Preheat oven to 350 degrees and line 24 muffins tins with cupcake liners
2.    Separate about 24 Oreos. Scrape off the cream centers and set aside for later, and put the cookies in the food processor.  Or if you are a poor college student, put them in a plastic bag to crunch by hand.
3.    Sift the crushed Oreos.  You will need 1 cup sifted cookies for the buttercream, so set that aside, and then add the extra sifted cookies to the larger pieces that did not sift. 
4.    Place 1 teaspoon of larger/extra sifted cookie into the bottom of each cupcake liner.
5.    In a large bowl, use a whisk to combine water, buttermilk, oil, sour cream and vanilla extract. 

6.   One at a time, add the eggs.  Be sure to stir well in between each addition, you do not need to beat the eggs though. 
7.    Slowly add Devil’s food cake mix while stirring.
8.   Fill cupcake liners (with the cookie crumbs on the bottom) ¾ full and bake for 13-18 minutes depending on how hot your oven gets.  The tops should spring back when you touch them.
9.   Place into air tight containers as they cool to seal in moisture. 
10. Oreo Buttercream:  For 5 minutes, beat cream cheese, butter and the Oreo cream centers you scraped off from the Oreos. 
11.   Add vanilla, powdered sugar and heavy cream and let beat again.
12.  Stir in Oreo crumbs and pipe onto cooled cupcakes. 


Sunday, June 26, 2011

Thin Blueberry Pie with Butermilk Crust


This pie has become a favorite of mine. I love that it is made in a pizza pan and allows for a thin slice. I found that 4 teaspoons of lemon juice was a little too tart for our family. I have an apple pie version in the oven as I type this. YUMMY!! Thanks to The Changeable Table for this great recipe.


Thin Blueberry Pie with Buttermilk Crust 

Ingredients:
Crust:
3 cups flour
1/2 tsp salt
1 cup shortening
1/4 cup butter (chilled)
1/2 cup buttermilk
1 Tbs oil

Blueberry Filling:
8 cups blueberries (frozen work as well as fresh)
1/2 cup cornstarch
1-1/2 cups sugar
1/4 tsp cinnamon
4 tsp lemon juice ( Used only used 2 teaspoons because my berry’s were tart )
3 Tbs chilled butter - cut in small slivers

Directions:

For Crust:
Mix together flour and salt, then cut in shortening and butter with a pastry blender until fat is the size of small peas. 

Stir together the buttermilk and oil, then pour into dry ingredients - reserving a few tablespoons in case the mixture is too moist. 

Stir with a fork until it comes together in a ball and starts to clean sides of mixing bowl.  (If it appears to be too dry - add remaining buttermilk/oil mixture as needed)

Don’t over-mix - as this will toughen the crust.

Form a large ball, then cut in half - with one half being slightly larger (this will be for your bottom crust)

Wet down your countertop with a damp cloth.

Cover area with plastic wrap, then place the larger half of your pastry on top.

Flatten slightly with your hand, then cover with another sheet of plastic wrap.

Roll evenly with a rolling pin - rolling “into” the cracks that form occasionally to keep it in a circular shape.

Turn pizza pan upside down on top of dough to check for size.  The dough should extend at least 2-3” beyond outer rim for adequate coverage.

Peel top layer of wrap off - then tip it (dough-side down) on top of pizza pan.

Use your fingers to press into the corners and sides, removing air bubbles.

Remove the second layer of wrap carefully.

Reserve second crust - and roll it the same way once the pie is filled.

Pie Filling:

Combine in large bowl cornstarch, sugar, and cinnamon.

Stir until combined and no lumps remain.

Add frozen blueberries and stir until well coated.

Pour this mixture into prepared pizza pan lined with bottom crust.  You will have additional sugar mixture that won’t adhere to the berries.  Distribute this evenly on top of berries.

Sprinkle with lemon juice, and dot with small slivers of butter.

Continue rolling the top crust as directed above - positioning it on top. 

Seal and flute edge.  Cut vents for steam.

This pie may overflow in your oven - as it’s very juicy.  (About half the time I have an overflow...)
To keep your oven clean - you may want to make a foil tray from heavy duty foil.  (Better safe than sorry, as my mother always told me...)Bake at 375° for about 1 hour - or until crust is golden brown and blueberry juice is bubbling from vents.Allow to cool slightly and then drizzle with powdered sugar/milk/vanilla glaze if desired.


Sunday, April 17, 2011

Butterfinger BLizzard Cupcakes

This recipe is definitely one of those Special Occasion type desserts. It is very rich and Yummy.  The cupcake and filling make this recipe so good you could forgo the icing and top with plain whipped cream.(Yum)
The Butterfinger Icing takes it up a notch. You will be popular for sure when you make and share this treat!!

Butterfinger Blizzard Cupcakes  from  Your Cup of Cake

(Printable Version) 

Caramel Sauce
6 tablespoons butter
¾ cup brown sugar
1 tablespoon water
pinch salt
1/3 cup plus 1 tablespoon evaporated milk
1 tablespoon vanilla

Chocolate Cake
Devil’s Food Cake Mix
3 eggs
½ cup water
¼ cup milk
½ cup oil
1 teaspoon vanilla extract
1 cup sour cream
½ can sweetened condensed milk
Caramel Sauce (homemade recipe above or store bought)

                                                                             
Butterfinger Buttercream    4 Butterfingers         ¾ cup butter        4 oz cream cheese      1 ½- 2 ½ cups powdered sugar             1 tablespoon milk

 Directions:
1.     Preheat oven to 350 degrees and line muffins tins with cupcake liners.
2.    If not using store bought caramel, make caramel by heating the butter, brown sugar, water and salt and let boil for 3-5 minutes while stirring constantly.  Remove from heat, pour in evaporated and stir in vanilla.  Set aside.
3.    Cake:  Lightly beat eggs, water, milk, and oil together.  Stir in vanilla and sour cream and cake mix.
4.    Fill cupcake liners ¾ full and bake for 13-18 minute or until a knife comes out clean. 
5.    While cupcakes are in the oven, mix sweetened condense milk and caramel sauce together.  Pour into a squeeze bottle with a small tip if available.
6.   While cupcake are still hot, fill with condensed milk/caramel mixture by pushing the tip of the squeeze bottle into them .  It can look ugly because you will cover it up later.  Or use a knife to cute out a shallow hole at the top of each cupcake and spoon  mixture into the hole.
7.    Keep cupcakes in airtight containers until ready to decorate. 
8.   Butterfinger Buttercream:  Here comes the tricky part… Unwrap the Butterfingers and do your best to shave off the chocolate layer.  Take the orange middles and crush in a bowl on in a plastic bag.  Sift as much of the candy as possible.  You want to get about ½ cup of orange Butterfinger powder. Make sure it is finely crushed so when you pipe it on the cupcakes it won't clog the opening of your tip.
9.   Beat butter and cream cheese for 5 minutes.  Add as much powdered sugar  as desired and milk ( I used heavy cream).  Add the sifted Butterfinger and beat well. 
10. Pipe onto cooled cupcakes and use the chocolate shavings and the parts that were too big to sift to decorate.   

Tuesday, March 22, 2011

Frosted Marshmallow Brownies

Marshmallow Chocolatey Goodness...Enough Said :0)


Frosted Marshmallow Bars from Baking Blonde
(Printable Version)
3/4 cup butter
1 1/2 cup sugar
3 eggs
1 tsp vanilla extract
1 1/3 cup flour
1/2 tsp baking powder
1/2 tsp salt
3 TBS baking cocoa
3-4 cups mini marshmallows
Preheat oven to 350.
Lightly grease a 9×13 pan with PAM
In a mixing bowl, cream the butter and sugar. Add eggs and vanilla beat until fluffy.
In a small bowl combine flour, baking powder, salt and cocoa. Stir to combine. Add the flour mixture to creamed mixture. spread in greased 9×13 pan.
Bake for 17-20 minutes. Remove from oven and sprinkle with marshmallows, return to oven 2-3 minutes, or just until marshmallows are soft.
Remove from oven. Using a knife dipped in water spread the metled marshmallows evenly over bars.
Frosting
3/4 stick butter
6 TBS Milk
1 1/4 cups sugar
1/2 cup mini marshmallows or 4-6 large marshmallows
1/2 cup Chocolate chips (maybe up to 3/4 cup depending how chocolatey you want it)
Combine ingredients (except marshmallows and chocolate chips) in medium saucepan and melt over medium low heat. Stir constantly until combined. Bring to a boil and boil for 1 minute.
Add marshmallows and chocolate chips
Stir until marshmallows and chips are melted.
Remove from heat. Allow to cool and thicken slightly (can set in sink of cold water to speed up process). Pour and spread over marshmallows on bars.
Allow to cool before cutting and serving.


Monday, March 7, 2011

Red Velvet Cake


I finally mad a Red Velvet  Cake....I was always afraid of the amount of food coloring used. I saw this recipe on Bakerella and decided it was time. I am going to make red velvet cupcakes next. This is a very moist cake with a yummy cream cheese icing.
 
Red Velvet Cake
2 1/2 cups all purpose flour
2 cups sugar
1 Tablespoon cocoa
1 teaspoon salt
1 teaspoon baking soda
2 eggs
1 1/2 cups oil
1 cup buttermilk
1 Tablespoon vinegar
1 teaspoon vanilla
2 oz. red food coloring
  • Preheat oven to 350 degrees.
  • Grease and flour two 8 inch cake pans.
  • Lightly stir eggs in a medium bowl with a wire whisk. Add remaining liquid ingredients and stir together with whisk until blended. Set aside.
  • Place all the dry ingredients in your mixing bowl and stir together really good with another wire whisk.
  • Add wet ingredients to the dry ingredients and mix on medium-high for about a minute or until completely combined.
  • Pour into cake pans and then drop the pans on the counter a few times to release any air bubbles.
  • Bake for about 30 minutes or until a toothpick inserted comes out clean.
  • After about ten minutes, remove from pans and cool completely on a wire rack. I also cover in plastic wrap while the cakes cool.
  • Then make the frosting.
Cream Cheese Frosting
8 oz. cream cheese, room temperature
1 cup butter, room temperature
1 teaspoon vanilla
6 cups confectioners’ sugar
  • Sift sugar and set aside.
  • Beat cream cheese and butter on high until creamy. Add vanilla.
  • Then, add the sugar in batches. Scrape down the sides in between each addition.
  • And frost away.

Saturday, January 29, 2011

Banana Roll

Do you ever grow tired of making banana bread with your "Ripe" bananas? If so then you must try this recipe.
I found it at a recipe blog called Pinch my Salt. She simply omitted the spices and pumpkin from a pumpkin roll recipe and added BANANA'S!!!! Genius in my opinion. This is a great recipe when you have extra bananas lying around. I added 1 tsp of cinnamon to the cream cheese mixture YUMMY!!


Banana Roll
(PRINTABLE VERSION)
Cake:
Powdered sugar
3/4 C. all-purpose flour
1/2 t. baking powder
1/2 t. baking soda
1/4 t. salt
3 eggs
1 C sugar
2/3 C. mashed banana (2 medium bananas)
Filling:
1 pkg. (8 oz.) cream cheese, softened
1 C. powdered sugar, sifted ( I added 1 tsp of cinnamon )
6 T. butter, softened
1 t. vanilla extract
1/4 C. powdered sugar (optional)
1. Preheat oven to 375°F. Grease 15×10 inch jelly-roll pan (also known as half sheet pan); line with parchment or waxed paper. Grease and flour paper; set aside. Spread out a clean, thin dish towel on the counter (make sure the towel is larger than your jelly roll pan); sprinkle liberally with powdered sugar (this can be done using a mesh strainer).
2. In a small bowl, whisk together flour, baking powder, baking soda.
3. In a large bowl combine eggs and sugar; beat until thickened. Add banana; beat until well mixed.
4. Stir in flour mixture into egg mixture. Spread batter evenly into prepared pan, easing it carefully to the corners with a spatula.
5. Bake in preheated 375 degree oven for 13 to 15 minutes or until center springs back when lightly touched.
6. Immediately loosen cake from edges of pan; invert cake onto the prepared towel. Remove pan; carefully peel off paper. Roll up cake in towel while hot, starting with 10-inch side. Cool completely on wire rack (will take at least an hour).
7. When cake is almost completely cooled, make the filling: beat cream cheese, powdered sugar, butter and vanilla extract in small mixer bowl until smooth.
8. When cake has cooled completely, unroll and spread with filling (or your favorite cream cheese frosting) then re-roll cake. Wrap rolled cake in plastic wrap then refrigerate at least one hour (overnight is best).
9. When ready to serve, unwrap cake and place on a platter. Sprinkle with powdered sugar if desired (sift the sugar through a small mesh strainer for a nice presentation). Cut into slices.

Saturday, January 22, 2011

Malted Milk Chocolate Chip Cookies

I think I found the perfect Valentine cookie for this year. I was surfing the net for cookie recipes and stumbled upon this recipe at Cookie Madness. I made a few changes and came up with a chocolate chip cookie that  is to die for!! It is a crunchewy cookie that has a hint of Malt and is sure to be a hit .

Malted Chocolate Chip Cookies (Printable Version)
adapted from Cookie Madness
1 cup butter
1 1/4 cups light brown sugar, packed
1/2 cup malted milk powder
2 tablespoons chocolate syrup
1 teaspoon vanilla
1 large egg
2 1/2 cups flour
1 teaspoon baking soda
½ teaspoon salt
2 cups semi-sweet chocolate chips
1 cup Heath toffee baking bits (optional)
Preheat oven to 350 degrees F.
In a mixing bowl, beat together butter, brown sugar, malted milk powder, chocolate syrup, and vanilla; beat for 2 minutes. Mix in egg.
In a small bowl mix flour, baking soda, and salt. Gradually add to creamed mixture.
Stir in chocolate chips
Shape into 1 1/2 to 2 inch balls; place about 3 inches apart on ungreased baking sheets.( lined my sheets with parchment paper )
Bake for 10 to 12 minutes or until golden brown.
Cool for 2 minutes on pan before removing to wire racks to cool completely.