Sunday, June 24, 2012

Teriyaki Chicken and Fried Rice


 We made this dish on Saturday. It was great. I paired it with fried rice and a fruit platter . The family enjoyed  the leftovers today. The chicken marinade was perfect and the fried rice was the perfect addition to this meal. 

Hawaiian BBQ Feast as seen on The Best Recipes EVAR
The Meat and Marinade
·         Boneless skinless Chicken Thighs, beef short ribs, or any kind of meat you want to use.
·         1 C. packed light brown sugar
·         1 C. soy sauce (I use the Aloha Shoyu Soy Sauce)
·         4-5 cloves of garlic chopped
        1 1/2 T. fresh ginger root chopped
·         1/4-1/2 large onion sliced
Marinade Directions
1.    In a bowl, mix the brown sugar and soy suace together. Keep mixing until almost all the sugar is dissolved in the soy sauce.
2.    Add in the garlic, ginger and onion and mix.
3.    Let the mixture sit for a few minutes.
4.    Put meat into a zip lock bag and pour mixture over it. (You can freeze the meat in the marinade at this point and when it is thawed the marinating time is over)
Depending on how much meat you have you may need to make more marinade and split this into 2 different bags. Let this marinade for at least 4 hours.
For the Grill
·         13×9 Pyrex dish or smaller depending on the amount of meat you have
·         1 stick of butter (trust me this makes the chicken so much better..however this recipe is great without it)
·         4-5 green onions sliced small
Grilling Directions
1.    Place Pyrex dish on the hot grill if you have room otherwise you can put it in the oven.
2.    Add the butter to the Pyrex so it starts to melt.
3.    Add the meat to the grill and cook to perfection.
4.    When the pieces of meat are done place them in the Pyrex to let swim in buttery goodness until all are done and add the green onions.

 For the Fried Rice
 
Fried rice made in a frying pan
For 1 to 2 portions
1 to 1 1/2 cups cooked plain rice
1 cup chopped green onion
1 cup chopped vegetables of your choice (see notes below)
1/2 to 1 cup chopped roast pork or ham
2 medium eggs
salt
pepper (white pepper is more traditional here, but black pepper is fine)
2 tsp. to 1 Tbsp. soy sauce I prefer Aloha Shoyu soy sauce as it is not as strong for our taste
cooking oil
optional: sesame oil
Equipment needed: A large frying pan (at least 28cm / 11” in diameter), spatula

Before you start cooking fried rice, you need to have everything ready to go.
First, the aromatic vegetables - the vegetables that add lots of flavor and
umami to your food. Here I have kept it simple and just used green onion (about
1 stalk), chopped up. You could also use regular onion, a little fresh ginger
and/or chopped garlic. If you want spicy fried rice, use a little chopped hot
red chili pepper, or dried chili pepper flakes or powder.

Next are the non-aromatic vegetables. I like to add at least a cup’s worth per
1- 1 1/2 cups of cooked rice. You can use any vegetables you like that are not too watery. Here I have used peas and carrots but  sweet bell pepper and zucchini work well too.

I also use some chopped precooked meat, which adds to the flavor - about 1/2 a cup’s worth per 1 to 1 1/2 cups of rice. Roast pork is nice, as are tiny whole shrimps or chopped shrimp, chicken, turkey, - anything you have. I’ve used some leftover roast ham here.
Eggs are a must-have in fried rice for me. Two medium or small eggs or 1 large to extra-large egg is enough. Beat it lightly with a pinch of salt added.
You’ll need some precooked rice of course. 1 to 1.5 cups will serve 1 person (or 2 people with small appetites) as the main dish of a meal. Leftover plain rice is great for fried rice, but make sure it’s hot or at least warm, not ice cold straight out of the fridge, which will cool down the pan and make the rice go greasy.
The easiest way to warm it up is to pop it in the microwave for a minute or two. If you don’t have a microwave, pour some boiling water over the rice and then drain it off very well before using.

If you are cooking rice fresh for the purpose of making fried rice, use a little less water than you might normally do, to have cooked through but firm and separate grains.
Finally, some seasonings and things: oil for cooking, salt, pepper and soy sauce. You could add other things here but let’s keep it simple.
Once all the components are ready, it’s time to start cooking. The cooking will go quite fast! Heat up the large frying pan - over high heat if you are using an electric heat source, medium to medium-high if you’re using gas. (If you have a very high heat output induction cooker, adjust the heat accordingly; the food should cook fast but not burn as soon as you add it to the pan!) Spread a little bit of oil on the bottom of the pan. The pan is hot enough when you drizzle a little bit of the beaten egg in it and it cooks right away, Pour in the beaten egg and spread it around the bottom of the pan, as if you were making an omelette.

Break up the egg rapidly to make scrambled eggs.
When the eggs are nearly set but a bit runny, take them out of the pan, clean
off the pan if needed with the end of your spatula or a wadded up paper towel, and add a little fresh oil. Put the pan back on the heat and add the non-aromatic vegetables and cut up meat. Let cook for a couple of minutes, stirring gently.
Add the green onion and/or other aromatic vegetables you’re using. Stir around a couple more minutes, using the whole surface of the pan. Season with a sprinkle of salt and pepper. It should smell very good now.
Add the warm rice and spread it thinly over the bottom of the pan. Break up any clumps with the end of the spatula. When the rice is sizzling on the bottom, stir it up - but let the heat of the pan do it s work before you stir like crazy. If the rice gets stuck to the pan a bit, scrape it off as you go along.(I prefer not to add more oil at this point, since it makes the rice greasy.)
Re-add the scrambled egg and stir.
Clear a space on the bottom of the pan. Pour the soy sauce directly on that hot spot on the pan - it will sizzle. Immediately mix the soy sauce into the rice. This method ensures that the soy sauce flavor gets distributed more evenly instead of getting absorbed by the rice grains in one spot, and also adds a bit of toasty flavor to the whole thing.

Taste, and season with pepper and additional salt if needed. If you prefer, you can add a few drops of sesame oil at this point. Serve immediately while piping hot. (Cold fried rice is fine, but hot fried rice is much, much better.)
key points to making fried rice in a frying pan:

The most important rule: Do not overcrowd the pan! That is the sure way to make sticky, greasy fried rice. For a large 11 to 12 inch (28-30cm) frying pan 3 cups of rice worth of fried rice is probably the maximum you can do successfully at one time.
Have everything cut up and ready to go before you start cooking.                                                            
Warm up the rice before using it. Don’t use ice cold rice
If using an electric heat source, use the highest setting you can achieve.   If using gas, use medium-high heat. Make sure your frying pan is hot, and that you use the entire bottom surface of the pan.
Cook the eggs first, then take them out of the pan, to have soft eggs rather than hard little egg-bullets.Cook the vegetables and meat/shrimp through and season before adding the rice. If the rice gets a bit stuck to the pan, just scrape it off; adding more oil to the rice will make it greasy.
 “Sizzle” the soy sauce on the bare surface of the frying pan, rather than pouring soy sauce onto the rice. Variations You can vary fried rice by using different aromatic vegetables, different protein, and so on. As I said above, fried rice is a great way to use up leftovers! Here are some ideas:
Use about 2 tablespoons of finely chopped fresh ginger instead of the green onion.
Finely slice 2-3 cloves of garlic, and fry them until soft. Remove the garlic and cook the rice in the garlic-scented oil. Add the garlic back at the end.
Use finely chopped white onion and sauté it in butter instead of oil. Omit the soy sauce and just season with salt and pepper. Add some grated Parmesan cheese and dry oregano at the end.
Precooked, finely diced bamboo shoots, water chestnuts are great crunchy additions to fried rice.


Saturday, March 31, 2012

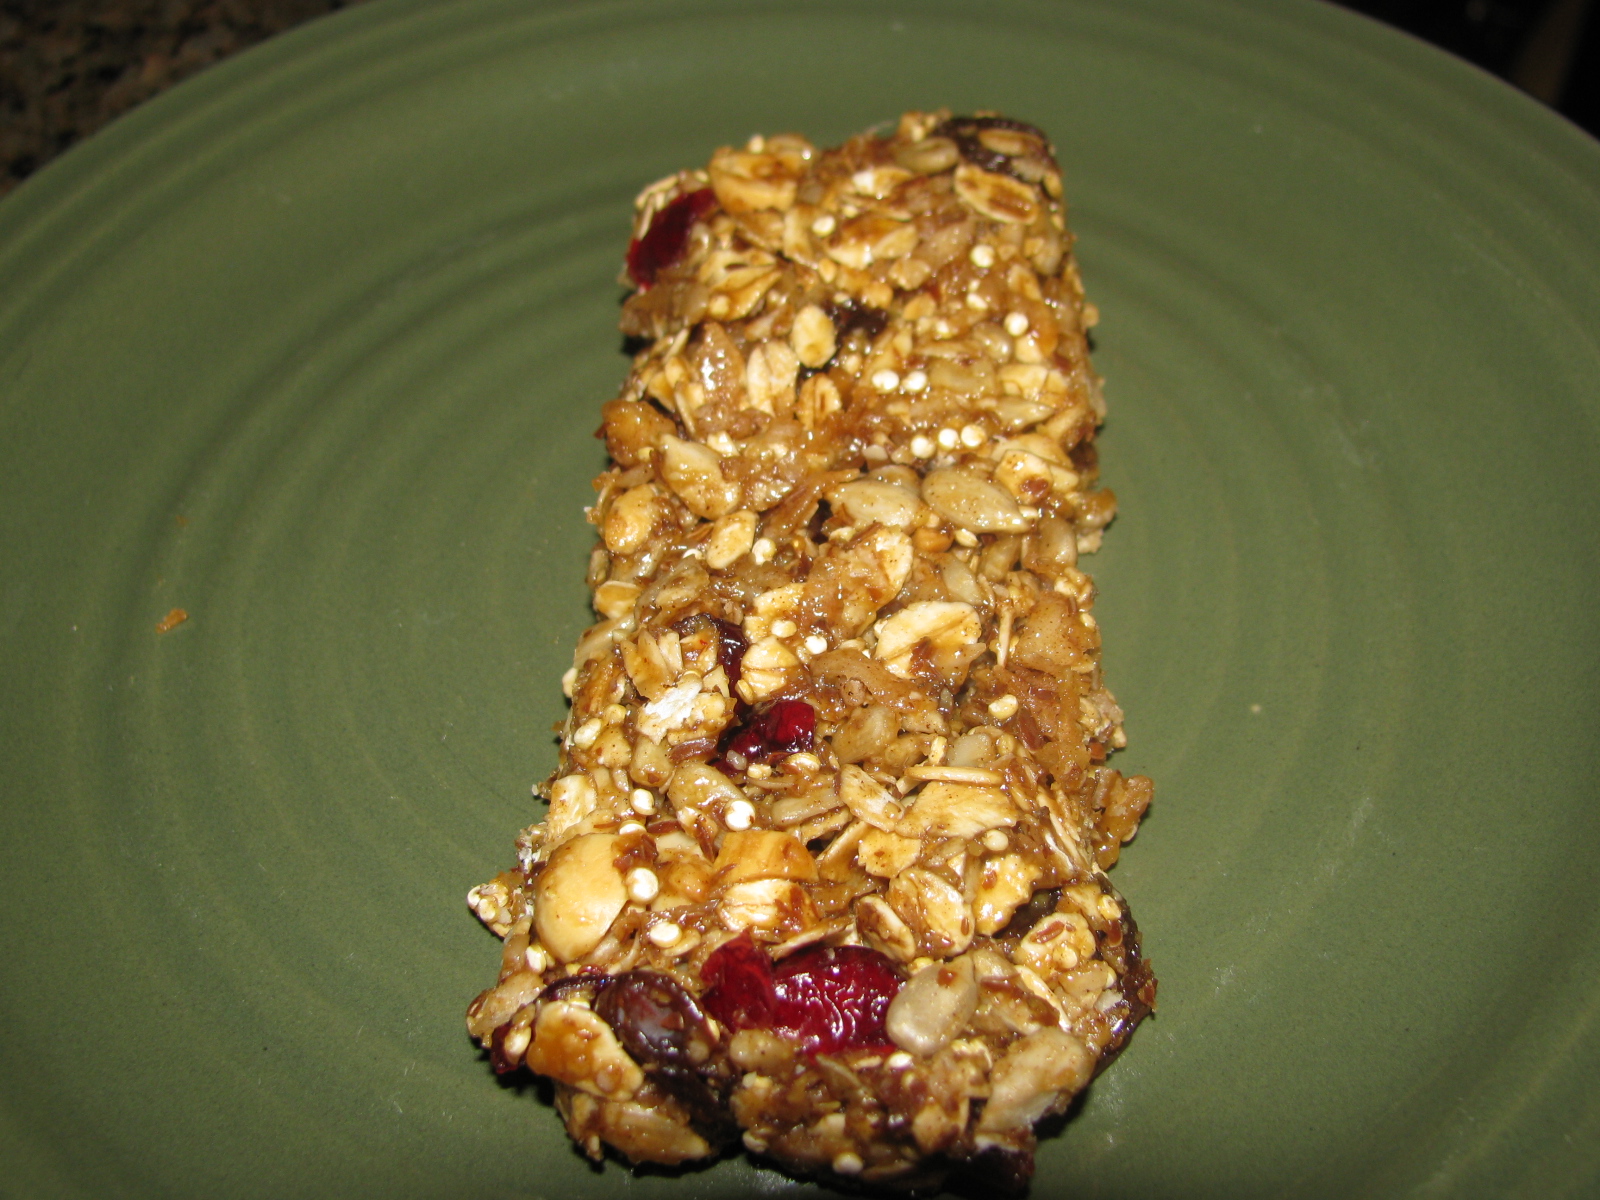
Healthy Granola Bars


  My daughter requested that I get this recipe from a friend's mother. Turns out she found it on The Sisters Cafe. It is a great recipe and comes together quickly. I have substituted the peanutbutter for almond butter with great results.
Healthy Granola Bars
2 cups old-fashioned oats
1/2 c. flax seed, milled
1/4 c. quinoa
3/4 c. shelled sunflower seeds
1 c. chopped nuts (any kind or combination)
1 c. shredded coconut
1/2 to 1 tsp. cinnamon (desired amount)
1/2 tsp. salt
1/2 c. brown sugar or organic agave nectar
1/2 c. honey
2 tsp. molasses
4 T. butter
2 tsp. vanilla
4 T. peanut butter (we used a scant 1/2 cup)
1 c. dried, chopped fruit (optional) (We used craisins and raisins)
1. mix first 8 ingredients together and place on a rimmed baking sheet. toast in a 400 degree oven for 12 minutes. stir and let cool at least 15 minutes.
2. bring next 4 ingredients to a simmer, stirring continuously. stir in the vanilla and peanut butter and cool for 2-3 minutes, stirring occasionally.
3. put the toasted ingredients and dried fruit in a large bowl and pour the liquid ingredients over it. mix very well.
4. place parchment or wax paper in the rimmed baking sheet and butter the top side, then place the granola bar mixture in the pan. put another butter sheet of paper, buttered side down, on top of the mixture and press down. roll with a rolling pin to make it very tight, smooth, and even.
5. let set for 2-3 hours and cut into desired bar size. makes about 20-24 bars. package in snack size bags or an airtight container. if not using within next few days, store in freezer. they keep very well, and thaw quickly. (really yummy frozen, too!)
 

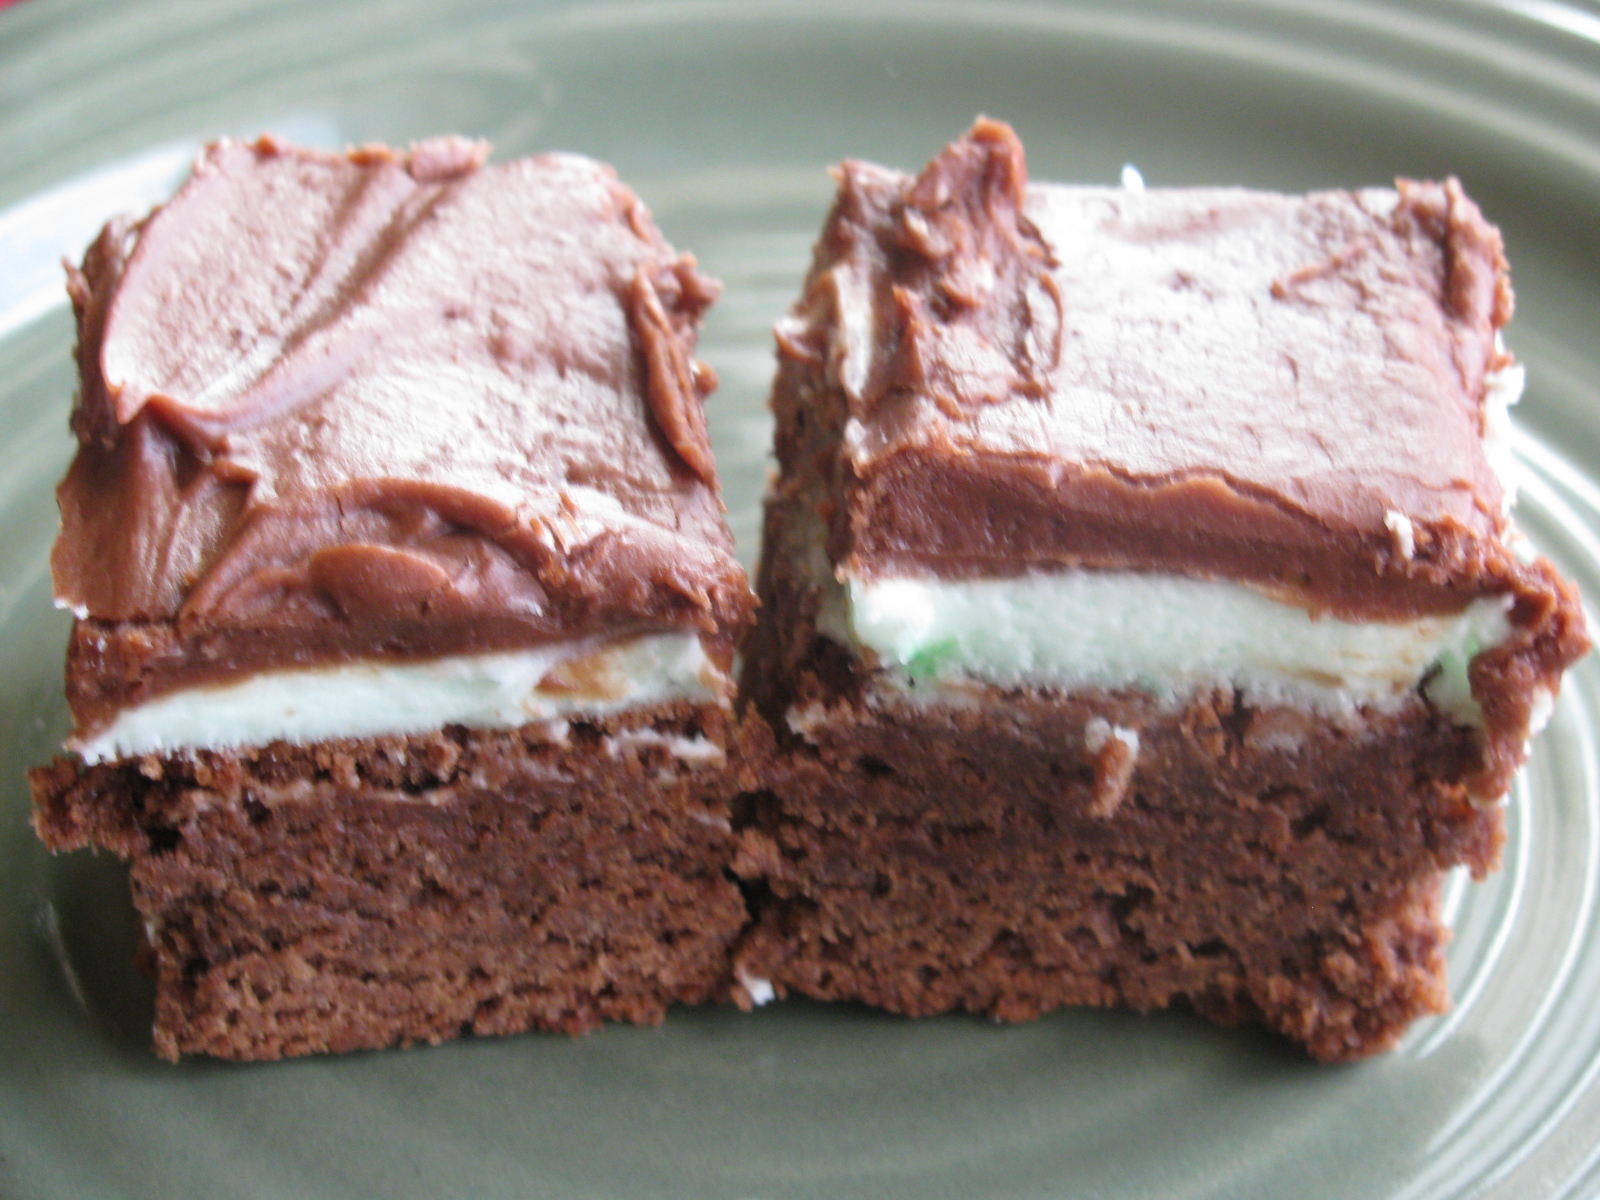
BYU Mint Brownies

I have recently been using some of the Doterra Essential oils and decided to try the peppermint oil in this brownie recipe. It worked perfectly. These brownies were a hit !!! This is the classic BYU Mint Brownie Recipes that is sold on campus. Enjoy !!
BYU MINT BROWNIES
MAKES ONE 9-BY-13 PAN OF BROWNIES.
PREP AND COOK: 90 min. COOL: 1 hr.
1 c. margarine
1/2 c. cocoa
2 Tbsp. honey
4 eggs
2 c. sugar
1 3/4 c. flour
1/2 Tbsp. baking powder
1/2 tsp. salt
1 c. chopped walnuts
12 oz. chocolate icing (Use your own icing recipe or purchase some chocolate frosting. You can also search the Internet for chocolate icing recipes.)
MINT ICING
5 Tbsp. margarine
dash of salt
3 Tbsp. milk
1 Tbsp. light corn syrup
2 1/3 c. powdered sugar
1/2 tsp. mint extract
1-2 drops green food coloring

1. Melt margarine and mix in cocoa. Allow to cool. Add honey, eggs, sugar, flour, baking powder, and salt. Mix well. Add nuts. Pour batter into a greased 9-by-13 baking pan. Bake at 350 degrees for 25 minutes. Cool.

2. Prepare mint icing: Soften margarine. Add salt, corn syrup, and powdered sugar. Beat until smooth and fluffy. Add mint extract and food coloring. Mix. Add milk gradually until the consistency is a little thinner than cake frosting.

3. Spread mint icing over brownies. Place brownies in the freezer for a short time to stiffen the icing. Remove from the freezer and carefully add a layer of chocolate icing.

Monday, February 20, 2012

Buttery Sugar Glazed Doughnuts

Okay I must admit memories of homemade doughnuts are only those from a young women activity in high school the result was a sugary grease bomb. This recipe turned out perfectly and if you make sure your  oil is hot (350*-360*) before frying the doughnuts will not be greasy. The kids are ecstatic and kinda think I'm cool for venturing out in this arena. Next time we will experiment with a few different toppings. I chose to keep it simple today. :) I saw this recipe at Real Mom Kitchen she did hers heart shaped for Valentines day .


Buttery Sugar Glazed Doughnuts
makes 26 doughnuts and holes (Print This)

Yeast Doughnuts
1 cup warm milk
1/3 cup sugar
1 package instant yeast
2 large eggs, beaten
1 1/3 stick melted butter (not hot, just melted)
1 tablespoon Vanilla
4 cup All Purpose Flour
pinch of salt
Oil, for frying

Add sugar to the warm milk (around 110 degrees), and stir until the sugar is dissolved. Add the yeast, and allow to rest around 10 minutes.

Combine the eggs with the butter and vanilla in the bowl of a stand mixer. Mix on medium low speed with the dough hook until well combined. After the 10 minutes have passed on the yeast, add the mixture to the butter/egg combination, and mix for a few minutes. In a separate bowl, combine the flour and salt

Begin adding the flour, one half cup at a time, until it is all incorporated. Use a medium speed for this. Do not over knead, dough will be a bit sticky.

Remove dough from the mixer, and place in a greased bowl. Cover tightly and refrigerate for 4-5 hours, or overnight is you wish.

Roll out the dough to 1/3 to 1/5 inch thickness. Cut with a doughnut cutter (or biscuit cutter)

Place cut doughnuts on parchment, and allow to rise in a warm place until very airy and light.

Heat oil to 350/360, and drop doughnuts in one at a time. Cooking time will vary based on the heat of your oil, but 15 seconds per side worked for me. Remove from oil and pat with paper towels. Continue until all doughnuts are fried.

Dip in glaze. Allow to dry. Dip again, if desired. Serve and enjoy!

Doughnut Glaze
4 cups powdered sugar
3/4 teaspoon salt
2 teaspoons vanilla
2/3 cup milk

Stir all ingredients together until well combine


Saturday, February 18, 2012

Vanilla Cupcakes with Raspberry Filling


I made thes great cupcakes for Valentines Day. They were a big hit. I found the recipe at Jamie cooks it up. This recipe is a definite keeper.
Vanilla Cupcakes wih Raspberry Filling
RASPBERRY FILLING:
2 heaping C (one 12 ounce package) frozen raspberries
1 1/2 T cornstarch
2 T lemon juice
1/2 C sugar
1 T butter
1 t almond extract
dash salt

CUPCAKE:
1 box Duncan Hines White Cake Mix
1/3 C flour
1 (3.4 ounce) box instant vanilla pudding
4 eggs
1/3 C sour cream
1 1/2 C water
1/3 C oil
1 t almond extract

FROSTING:
1 (8 ounce) package cream cheese, softened
1/2 C butter, softened
3 T shortening (I use butter flavored Crisco)
5 1/2 C powdered sugar
4 T whipping cream
1 t vanilla
dash salt

RASPBERRY FILLING
1. Place 2 heaping cups frozen raspberries, 1 1/2 T cornstarch, 2 T lemon juice and 1/2 C sugar into a medium sized sauce pan. Stir it around with a whisk to combine.
2. Bring the mixture to a boil over medium high heat, stirring constantly. The raspberries will break down very quickly. Continue to stir while the mixture boils for about 2 minutes.
or until the filling becomes glossy and thick...like this.
3. Remove the pan from the heat, add 1 tablespoon butter, 1 teaspoon almond extract and a dash of salt. The filling is a bit sour if eaten plain. However, remember that we are going to pipe it into a sweet cupcake and top it with an even sweeter frosting. The sweet and tart will work nicely together.
4. Set the filling aside to cool.

CUPCAKES
1. Into your stand mixer add 1 box white cake mix, 1/3 C flour and 1 small box of vanilla pudding. Toss it around with a fork to combine.
2. Add 4 eggs, 1/3 C sour cream, 1 1/2 C water, 1/3 C oil and 1 t almond extract to the dry ingredients. Mix on low for about 1 minute. Then scrape the sides of you mixer with a rubber spatula and beat on medium speed until the batter is smooth and a bit thick. 2-3 minutes should do the trick.
3. Line your muffin tins with cupcake liners and spoon the batter into them.  Fill the liners just a bit over half way full. This will give you a nice round domed cupcake. If you fill them too full  you will have cupcakes with more of a mushroom shape.
4. Bake the cupcakes at 350 degrees for 12-15 minutes or until a toothpick inserted into the center comes out clean.
5. Remove the pans from you oven and allow the cupcakes to rest in the pans for about 5 minutes. Then transfer them to a wire rack and let them cool completely.
6. When your cupcakes (and filling) have cooled completely, place a large cake decorating tip into a pastry bag. Carefully fill the bag with the raspberry filling. This can get a little bit messy. Be sure that when you are filling the bag you turn the tip end up a bit so the filling doesn't run out.
7. Pipe the filling into each cupcake.

FROSTING
1. Place 1 package softened cream cheese, 1/2 C softened butter and 3 tablespoons shortning into your stand mixer. Beat on medium speed until well combined and smooth.
2. Add 5 1/2 C powdered sugar, 4 tablespoons whipping cream, 1 teaspoon vanilla and a dash of salt. Mix until well combined. If the mixture is too thick, add a bit more whipping cream. If it gets too runny, add a bit more powdered sugar.
3. Fill another pastry bag with the frosting and pipe it onto each cupcake.


Friday, February 10, 2012

Sweetheart Peanut butter blossoms


I saw this version of peanut butter blossoms on my sisters cafe.......amazing perfect for Valentines day !!!

Sweet “Heart” Peanut Blossoms
1/2 cup butter
1/2 cup peanut butter
½ cup sugar
½ cup brown sugar
1 egg
1 tsp vanilla
1 ¾ cup flour
1 tsp soda
½ tsp salt
1 package heart shaped chocolates

Cream butter and sugars. Add egg and vanilla. Add dry ingredients. Roll into balls. Place on ungreased baking sheet. Bake 8 minutes at 375°. Then press heart shaped chocolate gently into each cookie. Bake 1-3 minutes longer.

(Print This)

Saturday, February 4, 2012

Olive Garden Style Salad


Last night we had planned on feeding the sister missionaries for our church . It turns out that one of them had the flu so I delivered dinner to them. We made  Pasta e Fagioli Soup, breadsticks, and this wonderful Copy cat salad recipe. The dressing is creamier than the original Olive Garden dressing but it doesn't dissapoint. Turn your kitchen into the "Olive Garden " tonight :) The whole family loved this.

Olive Garden Salad with Homemade Dressing

Time: 15 minutes  ... 
Yield: 6-8 servings
Recipe from Copy Cat Recipes
(Printable Version)
2 romaine lettuce hearts (you just want the hearts, they will give you a crisp crunchy texture.) 3 Roma tomatoes
1/2 red onion
1/2 C medium sized olives
1 C croutons
1/4 C Parmesan cheese

Dressing:
1/2 C mayonnaise
1/3 C white vinegar
1 t Canola oil
2 T corn syrup
4 T Parmesan cheese
1 t minced garlic
1/2 t Italian Seasoning
1/2 t parsley, dried
1 T lemon juice

1. Combine all dressing ingredients in a blender or small food processor and mix until well combined. 2. Chop your lettuce, tomatoes and red onion. Add your olives, croutons and Parmesan cheese. Toss to combine.
3. Pour dressing over the top. Toss to coat and serve immediately.
 

Monday, January 16, 2012

Multigrain Bread

When I saw this great recipe show up on Our Best Bites I knew I would be making it as soon as I had a chance to purchase the 7 grain cereal blend. I made this today and it was big hit in my house even with my picky 4 year old grandaughter. If you like making your own bread and want one that is perfect for sandwiches then look no further :)

Cooks Illistrated Multigrain Bread

printable version

1 1/4 c. 7-grain hot cereal mix (like Bob's Red Mill or Arrowhead Mills)
**(I used 7 grain cereal from Winco's bulk section)
2 1/2 c.  boiling water
3 c. flour
1 1/2 c. whole wheat flour
4 tbsp honey
4 tbsp unsalted butter, melted and cooled slightly
2 1/2 tsp instant yeast
1 tbsp table salt
3/4 c unsalted pumpkin or sunflower seeds (I left these out)
1/2 c old-fashioned rolled oats or quick oats
1. Place cereal mix in bowl of mixer and pour boiling water over it; let stand, stirring occasionally, until mixture cools to 100 degrees and resembles thick porridge, about 1 hour. Whisk flours in medium bowl.
2. Once grain mixture has cooled, add honey, melted butter, and yeast and stir to combine. Attach bowl to standing mixer fitted with dough hook. With mixer running on low speed, add flours, 1/2 c at a time, and knead until dough forms ball, 1 1/2 to 2 minutes; cover bowl with plastic and let dough rest 20 minutes. Add salt and knead on medium-low speed until dough clears sides of bowl, 3 to 4 minutes (add 2-3 tbsp flour if needed). Continue to knead dough for 5 more minutes. Add seeds and knead for another 15 seconds. Transfer dough to floured work surface and knead by hand until seeds are dispersed evenly and dough forms smooth, taut ball. Place dough into greased container with 4-qt capacity; cover with plastic wrap and allow to rise until doubled, 45 to 60 minutes.
3. Adjust oven rack to middle position; heat oven to 375 degrees. Spray two 9×5 loaf pans with nonstick cooking spray. Transfer dough to lightly floured work surface and pat into 12×9 inch rectangle; cut dough in half crosswise. Shape loaves and coat with oats; cover lightly with plastic wrap and let rise until almost doubled in size, 30 to 40 minutes. Bake until internal temperature registers 200 degrees, 35 to 40 minutes. Remove loaves from pans and cool on wire rack before slicing, about 3 hours.
4. Leftover bread can be wrapped in a double layer of plastic wrap and stored at room temperature for 3 days; wrap with an additional layer of aluminum foil and the bread can be frozen for up to one month.